A Firm Believer in Active & Healthy Lifestyle

Wednesday, 7 January 2015

Cheesy Stuffed Pork Steak with Onion Sauce

Fried onion mixture:
1/2 packet shimeiji mushroom washed and finely chopped
4 medium size onions peeled and finely chopped
2 tablespoon oil
A pinch of salt and pepper *optional to omit*
Stir fry the onions and mushroom till lightly brown and leave aside. You will use half for the pork steak and half for onion sauce.

Pork steak:
500gm of mince pork
3 tablespoon of panko or breadcrumbs
2 eggs
1/2 fried onion mixture
1 teaspoon ground nutmeg
1/2 teaspoon salt

1/2 teaspoon pepper
4 slices of cheddar cheese (from a cheddar cheese block)
Oil for frying
1 bowl of water
Mix well the mince pork with all the above ingredients.
Shaped them into steak and make a well in the centre.
Place 1 sliced cheese in the centre and cover and roll back and forth the meat steak.
Heat oil in a frying pan.
Place meat steak and fry until golden brown and flip to the other side . Once both side is golden brown, add in 1 bowl of water and cover the pan with a lid.  Cook until the water evaporates. The water will help to steam the meat steak and prevent it from drying.
Once water evaporate, remove the meat steak and set aside.

Onion Sauce:
1/2 fried onion mixture
3 tablespoon all purpose flour
* butter or oil optional*
Salt pepper sugar to taste
Using the same pan to make the sauce. Add in the fried onion mixture and lightly fry it. Push it aside.
If the pan is dried up, heat some butter until melted (or oil) and add in flour to make a roux or thickening. Fry the mixture until lightly golden color and mix it with the fried onion mixture. Fry until combined and add in 1 bowl of water. Stir and break up any flour lumps. Add salt , pepper and sugar and adjust taste to your liking.
Remove sauce from pan into a bowl and set aside.

Mixed vegetable:
1 carrot cut into strips
1 bunch of French beans cut into bite size pieces
1/2 packet shimeiji mushroom
salt and pepper to taste *optional to omit*
Stir fry all the above veggies until slightly cooked and leave aside until ready for assemble.

Hasselback roasted potatoes:
4 Russet potatoes
Olive oil
Salt pepper to taste
* Herbs of your choice optional*
Wash and scrub the potatoes to remove any dirt or soil.
Cut a small piece to allow the potato to sit firmly.
Cut thin slice of the potatoes without cutting through. Place a large wooden spoon in front of the potato as a guideline.
Pour olive oil and rub salt and pepper.
Roast it in a preheated oven of 250'C for 25 minutes. Every now and then, brush oil on the surface of the potatoes to prevent it from drying. You may sprinkle herbs of your choice.

The Perfect Grilled Cheese Sandwich


4 slices of white bread
3 tbs butter
2 sliced cheese
1 tomato sliced thinly
A sprinkle of dried basil
Salt and pepper to taste

Spread butter on the outer side of the bread.
Placed cheese sliced inside. Topped with tomato slices and sprinkle basil, salt and pepper to taste. Cover with another sliced of bread. Butter the top side.

Heat a pan and melt a dollop of butter. Place sandwich butter side down. Using spatula, turn the sandwich every now and then to get the bottom side evenly browned. Once bottom side is evenly browned, using a spatula, carefully turn the sandwich over to brown the other side.

Remove from pan and sliced the sandwich into halves. You know you get a perfect grilled cheese sandwich when both sides are evenly browned and the sandwich oozes out warm melted cheese.

Sour Spicy Vegetable Stew @ Chai Boey


2 cloves garlic
6 pieces dried chilli (seeds removed)
10 pieces tamarind slice
1 thumb size ginger
1/4 roast duck or 1/2 roast trotter or 1/2 roast chicken
2 stalk Chinese Mustard green "kai choy"
500ml water
90ml Light soy sauce
Sugar to taste
Oil for cooking

Method:
Heat oil and stir fry garlic, ginger, dried chilli and tamarind slice until fragrant.
Add in meat of choice. Here I am using 1/4 roast duck. Mix well.
Add in water and bring to boil. Once boiling, turn down the heat to low and add in Chinese Mustard Green vegetables. Add in the 90ml of soya sauce and additional water until it is the same level with the vegetable level. Simmer on low heat for about an hour.  Finally, add in sugar to taste.

Mint Curry Fish


4 pieces fish fillet
4 tbsp oil
2 stalks lemongrass, lightly crushed
3-4 cups water
1 1/4 cup (300ml) coconut milk
2-3 tomatoes, quartered
10 okra (or add eggplant if desired )
1 Stalk mint leaves
Mint leaves for garnish

Blend finely:
120g (4oz) shallots
4 cloves garlic
1 inch ginger or galangal (lengkuas)
2 candlenuts
1/2 tbsp toasted belacan
6- 8 pieces dried chillies that have been soaked until softened
Salt & sugar to taste

Spices:
Curry powder (mixed with 4 tbsp water to form a paste):
2 tbsp ground coriander
1/2 tbsp ground turmeric
1/2 tsp ground cumin

Method

Rub some salt over the fish and set aside for 1/2 hour before rinsing it off. Ensure there is no blood left on the fish as it may cause bitterness in the curry.
In the meantime, heat up 4 tbsp oil in a large pan/pot. Fry the blended ingredients (shallots, garlic etc) for 3-5 minutes. Then add curry powder mixture continue frying for 2 minutes until the chilli split oil into the pan. Add the lemongrass.
Add water, cover and bring to a boil. Simmer for 1/2 hour. Then add coconut milk. Once it starts to simmer, quickly add tomatoes and okra. Simmer for 5 minutes then add in fish fillet. Cover and simmer gently for 10 minutes until the fish is cooked. Turn off the heat and let it sit for 3 minutes so that the oil rises to the top. Dish out
immediately, garnish with mint leaves and serve hot with steamed white rice.

Friday, 5 September 2014

Project Pestle & Mortar (Cheng Ku)

I remembered back in the old days, I used to help out my granny pound away chillies and spices with her mortar and pestle . I was just a mere 10years old and being a nosy curious little brat, I often would disturb my granny in the kitchen just to find her squatting and pounding away spices and herbs to be cooked into a delicious dish of curry fish or curry chicken.
I offered to help my ah ma as I fondly referred my granny. I would offer to pound the spices for her so she could proceed with other kitchen chores. She would always tell me not to lift the pestle too high or else suffer being bashed my fingers or do not pound too hard or else the spices will "fly" into my eyes...

I was given a brand new mortar and pestle by my mum recently and I am absolutely excited to start pounding away. But first, lets learn how to clean, and season it. You will need :

An old used towel
Some stack of old newspaper
1 Cup Uncooked rice
Rough salt
Garlic
Coriander seeds
Cumin
Anise


 Place an old towel and some stack of old newspaper below the mortar and pestle to protect your working surface. Pour in 1/4 cup of uncooked rice and an equal amount of rough salt. Crush, pound and grind until it becomes like rice flour. Making sure to grind all the way up the side walls to get a smooth finish.


Once it all becomes a good powdery form, you will notice it is grey with dust left over from the pounding and grinding. Dump this into the dustbin. Continue to do this four more times until you finish up the 1 cup of uncooked rice.


This is the final result and as you can see the powder form is white in color meaning no more stone dust.


Soak the mortar and pestle overnight in water to strengthen the granite. Don't ask me how is this logical but this is an age old secret which was passed down from my granny to my mum.  Soak the mortar and pestle an hour before each use too.


Now the fun part in seasoning the mortar and pestle.
You can use any herbs or spices of your choice, but I like something oriental and aromatic.  Toss in garlic, coriander seeds, cumin, anise and some rough salt.


Crush them all into a fine paste covering all sides of the bowl. Leave it to sit overnight. Your kitchen will be filled with the scent of Thai food... Mmmmmmmm...


Finally, remove the paste and rinse with warm water. Use only hot water and a hard bristle or brush and avoid using soap

*Oh Ya FYI...I am a fan of Spongebob Lol

Sunday, 13 July 2014

Pennywort Juice (Air Pegaga)

Pennywort Juice peddlers had gone extinct as the years goes by, Use to remember seeing them so often by the roadside, mainly around the busy roads of Penang Island. All Malaysians regardless of race knows the health benefits of drinking Pennywort Juice or its call Jus Pegaga in Malay, which we fondly call it as well :). Preparing it is not a tedious process. Just adding water to blend the plant and squeeze or filter out the juice. Serving it with sugar syrup and ice would be the most ideal method as the taste of the Chlorophyll is pungent to some people. But none the less, it's a traditional drink during the hot weather and is suitable for all ages as well.

I bought about 2 handful of Pennywort Plant from Aeon Big at the cost of RM5 for both. After blending it all together with about 700ml of plain cooked water. You will need to filter the fibre through a siev. Then you will have a finish product of Pegaga Juice. Add in Syrup and Ice before serving it, if you feel its too concentrated, you can add in some plain water as well. Enjoy trying!


Some basic writeup of Air Pegaga / Pennywort Juice.
The health benefits of the pennywort plant were acknowledged many centuries ago for the treatment of various conditions. It is used as part of ayurvedic medicine, especially in traditional Indian and Chinese medicine practices. Pennywort is a perennial herb that originates in moist areas. It is native to India, Sri Lanka, Northern Australia as well as a few other areas in Asia. Pennywort has been associated with a few Asian Legends. It is alleged Tai Chi Chuan master, Li Ching-Yun, lived to the age of 256 years due to an assortment of herbs he consumed daily, one being pennywort. Another folklore tale is of King Aruna and his use of pennywort. He believed it enabled him the energy and stamina necessary for his harem of 50 women.

Pennywort is also known as centella asiatica, gotu kola, asiatic and indian pennywort, brahmi, marsh pennywort, common pennywort, waternavel, sombrevillo de aqua, bachelor's buttons and penny grass. The various names contribute to the region and language it is being used in around the world.

This herb works by averting a disorderly manner of the absorption of nutrition and corrects this process through an improved progression of digestion of nutrients. Pennywort has properties of being antibacterial, anti-viral, and anti- inflammatory. It contains vitamins B1, B2, B3, and B6 as well as the minerals, calcium, magnesium, sodium, manganese, and zinc.

The benefits of pennywort tea are numerous and many people use this tea as a health tonic. Maintaining youth and the treatment of arthritis are its most popular use. It is recongized as a longivity herb because of its ability to help rebuild connective tissue, which in turn, can slow the aging process. Plus, it has been commended as a great antidote for improving memory and, therefore, considered food for the brain. Studies have indicated by consuming 2-4 raw pennywort leaves a day may help sharpen alertness and memory and rejuvenate the brain. There is important research being conducted to observe the effects this herb can have on those suffering with Alzheimer’s disease.

The central nervous system can receive amazing benefits with the consumption of pennywort. This herb works well in relaxing the mind and can assist in certain nervous disorders, senility, strokes, ADD, and epilepsy. It can be utilized as a nerve tonic when coping with mental stress and fatigue and encourage sleep due to a nervous condition.

Pennywort can help protect our immune system from toxins. High blood pressure, congestive heart failure, venereal diseases and urinary tract infections are a few of a range of illnesses that can be treated with this remarkable herb. Because of its antibiotic properties, it has the capability to speed up the healing process of wounds. Futhermore, pennywort can improve blood flow while also reinforcing veins and capillaries, making them stronger. Studies have shown it to be beneficial in healing and preventing phlebitis, leg cramps, and blood clots as well as decrease the appearance of varicose veins. It is effective in bringing down fever and treating dysentery in children, which is a servere form of diarrhea.

Pennywort has also proved to cleanse and purify the blood stream and can remedy certain skin conditions such as eczema, chronic ulcers, sores, and scleroderma, which is a condition that hardens the skin. A powder can be made from the leaves of this plant and applied to the eruptions on the skin.

Happy trying readers!

Thursday, 3 July 2014

DIY Foam Roller


I have tried so many rollers but none gave me the satisfying feel of a deep  tissue / muscle massage. As our Asian body frame is smaller and our muscles are more compact, it is hard to get a roller to perform as expected…sigh… So I was thinking to myself that enough is enough. Its time that I DIY my own roller, to fit my own physical needs. Ok! Here is what you need:


       1.  4 inch Diameter (1.5 Feet long)       
             PVC Pipe
       2.  Foam Sheet
       3.  All surface glue
       4.  Tape


Steps
   1.       Wash the pipe and dry     it properly.

   2.       Apply glue inch by inch     and slowly roll the             foam onto the pipe.

   3.       Once the foam has           covered the pipe, cut         off the extra.

   4.       As you will see extra         foams at both sides,         Fold all the extra into         the PVC pipe.
   

   5.       Make sure before you fold in the extra, do apply glue to the excessive foam, So it       will stick inside the pipe.

   6.       Use the tape to tape up the inside of the pipe to make it look tidy.

       What is Foam Rolling About?

       Foam rolling is a self-myofascial release (SMR) technique that is used by athletes and physical therapists to inhibit overactive muscles. This form of stretching utilizes the concept of autogenic inhibition to improve soft tissue extensibility, thus relaxing the muscle and allowing the activation of the antagonist muscle.
This technique can be effective for many muscles, including: gastrocnemius, latissimus dorsi, piriformis, adductors, quadriceps, hamstrings, hip flexors, thoracic spine (trapezius and rhomboids), and TFL. It is accomplished by rolling the foam roller under each muscle group until a tender area is found, and maintaining pressure on the tender areas (known as trigger points) for 30 to 60 seconds.

While there is currently a lack of research completed with actual foam rollers, it is widely recognized that foam rollers have the same effects as deep-tissue massage. There has been lots of research on the effects of massage on the body much of which can also be carried over to rolling.

The equipment that is used for foam rolling usually consists of a foam cylinder of various sizes; commonly 12 inches long, 6 inches in diameter. However, longer foam rolls up to 36 inches in length are produced for rolling over certain muscles in the back. A variety of foam roller densities exist, often denoted by the color of the roller. Those new to foam rolling, or those who have particularly tight muscles or severe trigger points, often start with a softer foam roll. White rollers are typically softer, while blue and black rolls tend to be much firmer.

Courtesy of Wikipedia

Introducing My Bicycle Shop

In the middle of a peaceful yet serene township of BU4, lies a very low profile bicycle shop named “MY Bicycle Shop”. It’s a neighbourhood friendly bicycle shop that many parents would take their kids to buy their first bicycle as well as grandparents would bring their grandchildren’s bicycle for repair. This shop is so low profile that, not many knows, even some selected Cycling Competition Champions frequents this shop. Not to mention that they do serious  sponsorship to Pro Cyclist as well…..


Its has everything that you need for your cycling pleasure, be it you are a casual cyclist or a pro cyclist. If you cant find it, Our friendly “Johnny” will be able to order it for you. The first time I entered this shop, which was years ago. It brought me back a familiar childhood feeling of excitement when we enter into a stationary shop. You would have to spend some time looking into every nook and cranny to see if there is anything that fascinates you. In this case, it is bicycle parts for me now after growing up lol.


As for pricing, I find this shop is very appealing as their pricing is very reasonable. As for their customer service, they are very down to earth. With a combination of good pricing and great customer service, what more can we ask for? That is why I am recommending “My Bicycle Shop” to all my Trainees , Followers, Friends & Family.

Their Motto  GO GREEN!


This is where you will find them:

My Bicycle Shop
  • Lot G3, BU 4, Bandar Utama,
  • 47800 Petaling Jaya, Malaysia
  • 016 632 2599


- Me with a "Champion Bike"

Sunday, 18 May 2014

Carrot Facial Mask

Carrots are good to eat and great for your skin.  Known to be packed with antioxidants, especially rich in Vitamin A, and have been linked in various research to cancer prevention, vision improvement and lower risk of heart disease.

What about carrots and skin care? Rich in Beta Carotene, carrots are a natural source of vitamin A which has numerous benefits for our skin:
Rich in antioxidants - slows down the skin’s aging process and a natural anti aging factor. Helps maintain skin’s moisture. Contributes to skin cells renewal process. Effective for acne treatment - helps heal wounds and pimples and restore the skin. Antiseptic - strengthens the immune system and prevents infections.

I love juicing and one of my favorite juice is Carrot Milk. What about the pulp that has been left over? I decided to use the leftover pulp to treat myself with a Homemade Carrot Mask. Since it has all the goodness, why put it to waste.


Homemade Carrot Mask for Glowing Skin'
This recipe works to even out skin tone and give dull skin some much needed glow:


2 peeled, carrots.
1 teaspoon fresh lemon juice
2 tablespoons honey
1 teaspoon olive oil - do not add this ingredient if you have oily skin

Grate carrots until you obtained a fine pulp. Or use leftover carrot pulp from your carrot juice.

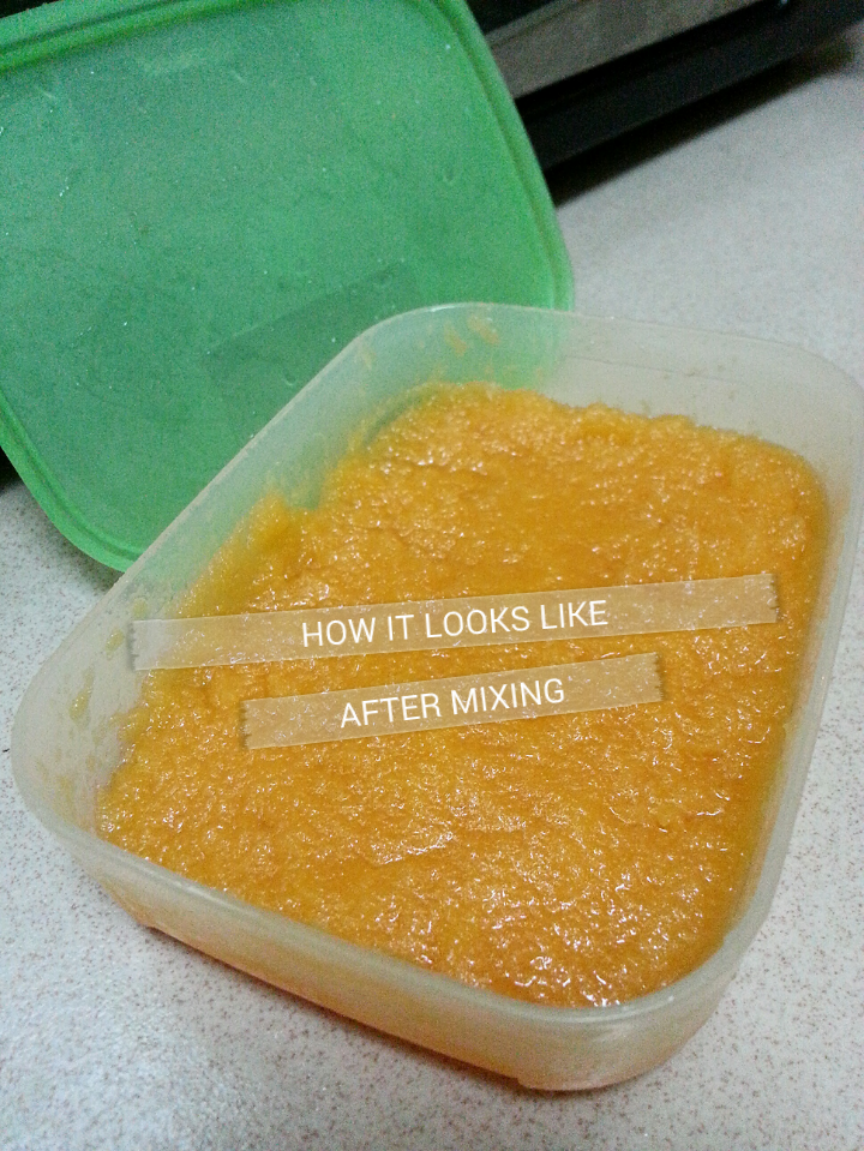
Mix all ingredients together to an even mixture - consistency should be like a good mashed potato recipe - not lumpy and not too mushy.  Apply to clean facial skin and leave on for 30 minutes.  Wash away with lukewarm water.

Sunday, 11 May 2014

~ Homemade Tomato Soup ~ Refreshing & Energizing


Tomato Soup

It has been raining these last few weeks and the cold weather calls for a warming soup. Tomato soup came to mind as I had a dozen of them lying around the fridge plus other vegetables and I thought this would be a good time to whip something easy and tasty. Plus, this is a great way to eat a lot of vegetables and it makes a great snack in between meals without going overboard on the calories.


Tomato Soup recipe:
4 medium ripped tomatoes
3 stalks of celery
1 carrot
1 large red onion
1/2 clove of garlic
2 tablespoon olive oil
1 teaspoon dried basil leaves
500ml water
Salt, Pepper, Sugar - To taste

Method:
1. Firstly, prepare your vegetables. Wash and cut your tomatoes and cut them into quarters and slice off any hard cores (they won't soften during cooking and you'd get hard bits in the soup at the end). Chopped celery and carrots into small pieces to allow even cooking. Peel and chopped onions and garlic and set aside.

2. Pour 2 tablespoon olive oil into a deep pot and heat it over low fire. Once the oil is heated up, add in onions and garlic and give it a quick stir. Add in tomatoes, celery and carrots and mix them with a wooden spoon. Still on low fire, cook the vegetables until they're soft and translucent in colour. This should take you around 10 to 15 minutes and you should stir them occasionally to cook them evenly.

3. Pour in water to the vegetables. Sprinkle a good pinch of salt, pepper and sugar according to your taste buds and dried basil leaves. Give it a good stir so all the flavour are well mixed. Put a lid over the pot and allow it to stew for a good 15 minutes, stirring occasionally. At the end of the cooking, the tomatoes will have broken down and be very slushy looking.

4. At this point, I used my hand immersion blender to grind. If you are using a blender, allow the soup to cool down and blend. Once the soup is blended nicely to a smooth purée consistency, return the pot to the stove and reheat the soup. Taste a spoonful  and add a pinch of salt, pepper or sugar if you think the soup needs it.

5. Ladle into bowls and serve.


Saturday, 10 May 2014

My Mother's Day weekend project- DIY Self pampering


This weekend is Mother's Day, and I thought what would be better than to share with you guys one of my latest craze. Self made pampering spa beauty products. To be honest, I have spend a lot a lot of money on beauty products throughout my 30's years of life and why shouldn't I? All the craze for skin whitening, pore tightening, acne free, oil free, anti-aging, wrinkle free, look 20 years kinda products, plus all the promise in the world to make a woman look 20 or 30 years younger. Okay okay, maybe I got a lil carried away, but who doesn't at least have 1 beauty product excluding the facial wash? I'm talking about the stuff that sits nicely on your table top. Yup. The toner, moisturizer, serum, SPF, mask, eye cream... You get the whole idea.
Today, I'm gonna share with you some of my latest favorite DIY mask, and scrubs that have so far worked for me and no adverse effect but all the healthy goodness of pure food for the skin.  The saying goes "you are what you eat" and why shouldn't what you eat be good enough to be applied....

Today, for my first entry of my DIY spa and beauty care, I'm gonna share with you guys an awesome 2 ingredient cleanser that will remove all dirt and all the goop that is stuck to your face... You read that right. A 2 ingredient face cleanser. This cleanser is especially so good to use in the morning, whereby you just have a slight amount of oil on your face from waking up and you don't feel like using your harsh cleanser? Well, I got good news. This 2 ingredient cleanser will remove all that. So enough of jibber jabber, below is the recipe.

2 ingredient face cleanser
2 tablespoon of rolled oats (you can read all the benefits of rolled oats here) Pic 1
2 tablespoon of gram flour (you can read what is gram flour and its benefits here) Pic 2 & 2a
A small plastic container for storage Pic 3

Method:
- In a blender, pour the rolled oats and blend finely until it resembles a flour consistency. The finer, the better. You now have what is called Oat Flour.
- Take your now oat flour and pour into the plastic container and add the gram flour to the mixture. Close it tight and give it a good shake so the ingredients blend and mix well.
- Let this plastic container sit nicely in your shower.

Usage:
- You can use this cleanser on wet or dry face but make sure no water drips in the container.
- Pour a small amount and mix with a little bit of water and using your fingers, slowly mix it until it resembles a paste.
- Apply the paste on your whole face and leave for 5 or 10 minutes while you get on your shower business. (You know I know what we are doing).
- Wet hands a little and scrub of the paste with Luke warm water.

NOTE:

If you leave it longer on your face, it acts like a mask. If you apply and wash off immediately, it acts like an instant cleanser. Either way, it still removes all the dirt and oil from your face without leaving a dry, flaky, redness to your face.


Wednesday, 27 November 2013

Confessions of a Sarong Party Mama

Amanda might be the power, made-of-steel woman but me, on the other hand, is more of a Yoga Mama. I work with emotions and feelings.

I know you don't have the time to do all that jazz but...let me tell you this...you do!

Let me show you how. And here comes the confession.

I am a Sarong Party Mama.

Yeah yeah...those were the younger days but you know what they say, you can take the party out of the mama but you can't take the sarong party out of a mama. They didn't say that? Well, I'll be damned. Someone SHOULD. =)

So, when I am not yoga-ing on my mat and I have dinner to make, I switch to music of choice (for me, it is hip hop music WITHOUT the swear words) and rap myself into my casserole dishes and dance up a mean case of steamed eggs with salted fish. Does it have to be hip hop music? Nah, it doesn't. You can ballet up a chicken rice or jazz your family up with a fantastic case of rendang. Whatever works. I heard some people actually managed to headbang their way into stir-fried vegetable dishes.

Don't laugh. Hahaha...

Can be done. Just tie your hair up or something. Or try not to get too excited when Sweet Child of Mine is playing.

If things are restrictive or gets too dangerous (tap dance is dangerous when you are trying to wash the bathroom and the floor is soapy. Don't try that), strap on some weights.

Ever tried dancing with leg weights and holding onto small little cutesy little pink dumbbells? I have. And damn. If it doesn't hurt and give you a run for your money, I don't know what will.

Try it. Switch the music on and let's get the Sarong Party started! =)


Sunday, 17 November 2013

OBESITY on the High! in Malaysia, Please take note people.

PETALING JAYA: Obesity needs to be highlighted as a disease to underline the gravity of the condition. Two health associations want the Government to move public awareness in this direction. Malaysian Society for the Study of Obesity president Prof Dr Mohd Ismail Noor said the situation had become more urgent because there were more overweight children now. “They do not recognise that it (obesity) is a disease. So, no one cares and think it is okay to be fat. Once you treat it as a disease, it will make people aware,” he said. He said obesity was the underlying factor for chronic diseases such as diabetes. Obesity and being overweight are among the risk factors for type II and gestational diabetes – which occurs during pregnancy. Malaysia is ranked sixth in the Asia-Pacific region for obesity and tops the list in South-East Asia for both obesity and diabetes. Deputy Health Minister Datuk Seri Dr Hilmi Yahaya recently said that there were about three million obese Malaysians and the number was increasing while there were about five million individuals who suffer from varying degrees of diabetes. A sedentary lifestyle is among the main factors for the high incidence. Dr Mohd Ismail said some parents thought having “chubby children” was a reflection that they were well-fed and cared for but they did not realise that the child was likely to be overweight during puberty and this would continue throughout their lifetime. “Once you are obese, it will be a lifelong problem,” he said. He felt that the reduction in subsidies in items such as sugar and oil would compel Malaysians to consume less of such food items. “You can always introduce food stamps for the poor so they are able to get the item if it gets too expensive once the subsidies are removed,” he said, adding that it was a “double whammy” as they would have to spend more on medical treatment if they fell sick. Nutrition Society of Malaysia (NSM) president Dr Tee E Siong said while obesity was not listed as a cause of mortality, it should be considered a disease in Malaysia when “communicating to the public”. “This is because obesity is a major risk factor to many non-communicable diseases such as diabetes, heart disease, stroke and certain types of cancers,” he said. “My main reason for calling obesity a disease is so that the public can become more aware of the dangers of the condition. “However, in calling obesity a disease, I certainly do not want it to have negative implications. For example, the obese children and adults should not be discriminated against,” he said. He added that the main point was not whether obesity was labelled a disease but it was for all stakeholders to give adequate attention towards preventing obesity with the highest political commitment. “It should be beyond merely establishing strategic plans and action plans. There should be a systematic approach towards combating the problem,” he said.
Article & Picture is borrowed from "The Star Publishing - Published: Sunday November 17, 2013 MYT 12:00:00 AM
Updated: Sunday November 17, 2013 MYT 9:07:24 AM"

Monday, 21 October 2013

Complete Guide To HIIT (High-Intensity Interval Training)

For you guys and gals who wanna give yourself a good workout session but time is a factor. Have fun! The Complete Guide to Interval Training

For more info on Personal Physical Training Program, Visit us @ Rebel Fitness KL

Saturday, 21 September 2013

 Getting up before the crack of dawn to get the little ones ready, preparing nutritious and delicious lunches and hauling off the munchkins on that big yellow bus! Yes school is back in session!

Now if you are a stay-at-home mother, a working mom, or a student yourself, back to school is not not be a bad thing. You are back into your daily routine – no beautiful weather distractions or vacations. That means no excuses to exercise, exercise, exercise.
Well I would not be me, if I did not give you a sweat sesh workout that will whip that booty into shape!

You won't even have to leave the house! Do it before the children wake up or after they go to be bed (and if you are student, before school or right before you get your homework done), you choose!

We here at Rebel Fitness KL is ever ready to assist or plan your weight loss journey no matter in which continent or country that you are in right now!! that is how flexible we are.


Get in touch: rebelfitnesskl@gmail.com or follow us on Google+